
Background information
Huawei without Google Services: A look at the Mate 30 and the future of Android
by Dominik Bärlocher

The Huawei P40 Pro doesn’t come with Google Services. Want to install them? Follow these 10 steps and you’ll have Play Store and YouTube back on your phone.
It’s possible. Google Mobile Services (GMS) can be installed on the Huawei P40 Pro. It’s not as easy as it used to be, but it’s comparable. The following guide shows you how to do the following:
I strongly recommend that you set the phone to English – at least for a short time. This will make it easier to follow this tutorial, as some options have different names in English and German.
Here are a few remarks about the hack:
This hack makes radical changes to the operating system – and changes the system in a way that’s not intended. There is a safety risk, in theory. But since the steps are the same as for the Mate 30 Pro – with a few extra tricks – I’m pretty sure nothing bad will happen.
We give our Huawei P40 Pros administrator rights. This makes it possible to make changes on a level that’s usually not possible. The problem lies under the App Layer. For a detailed explanation (in German) of the problem, check out this article:
An Android distribution with Google Services – which is far more than the App Store and Google Maps – looks like this:
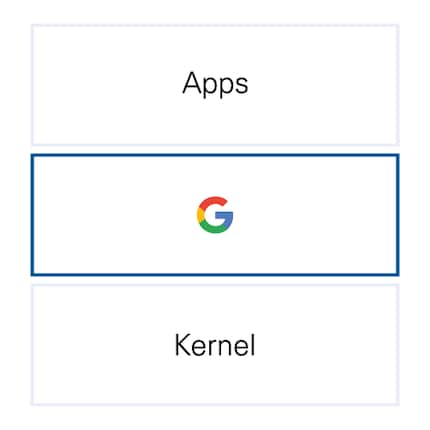
The middle level is where the services are stored. It’s a series of program interfaces that allow you to interact with Google's apps. The services are provided by Google and are used by app developers. It makes sure they don’t have to program every single connection into their apps. Instead, they tell the app: «App, use the service». That’s all it takes. But if the service is missing, the app will return an error or close down. That's the problem with Huawei phones.
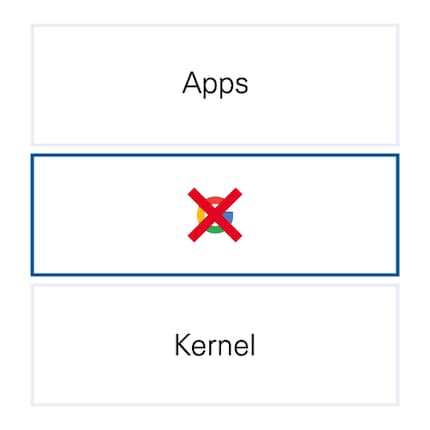
Huawei is solving the problem in the long term by building Huawei Mobile Services (HMS), which is the same as Google Mobile Services (GMS). However, the apps aren’t yet compatible with HMS, as they explicitly require GMS.
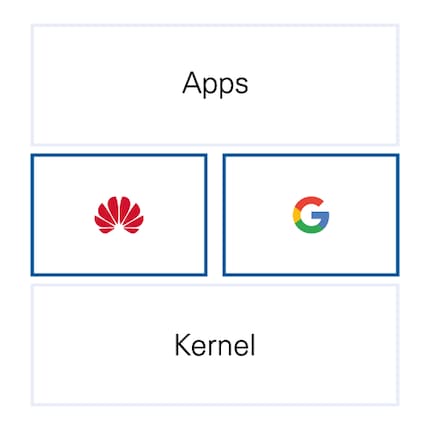
Since HMS aren’t yet ready for everyday use and the apps offered in Huawei’s App Gallery – charmingly referred to as «App Gary» by Huawei’s Mobile CEO Richard Yu – are still quite limited, many users want to upgrade the mobile services. In the end, GMS and HMS run in parallel.

Usually, you cannot access the services, as there’s no reason to do so. Interacting with the top level of the apps is enough. But not today.
Today, we’re letting a secure system know that we want to dig into and tinker with its inner workings.
For this hack, you need a little more hardware than for the previous version: you need a Windows computer. I'm sure there’s a way to make it work on Mac, too, but I can only confirm that it works with Windows at this moment.
Any Windows device will do, but I’m taking a Huawei laptop just for fun. But and other Windows device is also fine. The same goes for the USB stick: I used my Sandisk Extreme, which I usually use to transfer video files, but any USB storage device you can connect to the phone will do the job.
Now, let’s get started.
In order to access your phone later while working with the PC, you need to activate USB debugging. For this purpose, we activate the Developer Options:
This makes you a developer on your phone. Let's activate the one developer option we need.
In order to install things, we have to work with external memory. We need to restore a backup and, in our case, this is only possible using external storage.
Now connect the USB stick to the Huawei P40 Pro.
Now, we’re going to restore a backup. It's all about recovering a version of the app LZPlay with some settings and upgrading an app called Icebox. It's done quickly, but what we do here is giving a lot of rights to an app of unknown origin. This has to be the case, as this is exactly what administrator rights do. We use the software to give ourselves the rights to do and change everything on the phone. This is unusual and risky, but experience with the Mate 30 Pro shows that there’s no acute danger from LZPlay itself. Even after almost half a year, the Mate 30 Pro hasn't had any suspicious functionality or generated any strange traffic.
Don’t agree? Let me know by commenting below. Concerns are important, as these things shouldn’t happen without questioning. Just because I and the rest of the hacker community say that this is harmless «as far as we can tell», it doesn't mean it actually is. It just means that us hackers are pretty sure you won't do any permanent damage.
The system displays a backup dated 31 March 2020 at 06:35 a.m. The password is:
djb!digitec2501We've now completed the complex part of the operation.
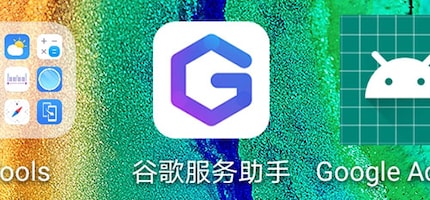
If you've done everything right so far, you'll have two apps on your home screen: an app called Icebox and an app with a Chinese name, generally called LZPlay.
The next part might spark this reaction from those concerned about security:

That's a sensible reaction. In the current political and economic situation, finding a safe way to get Google onto your Huawei device is impossible. There’s no absolute certainty that you can follow this guide without worrying. But: I’m not going to tell you what to do and what not to so. That’s up to you to decide. I'll show you how to do it, but you have to make your own decisions about your technology. But in the context of this guide I can say that the LZPlay app does exactly what it claims to do and nothing else. Lots of things, not just LZPlay, remain slightly risk when you dig so deep into your phone's system.
If you're interested in learning more, read the screen. This is exactly what having admin rights mean. Be aware that most users who express security concerns are making a legitimate point, but might have no experience at all. The experience with LZPlay, to date, is unanimous: «It’s safe as far as we can judge».
There’s a folder called «apk» on the USB storage. There are four apps in it. Install them in the order of the file names: first (1), then (2) and so on.
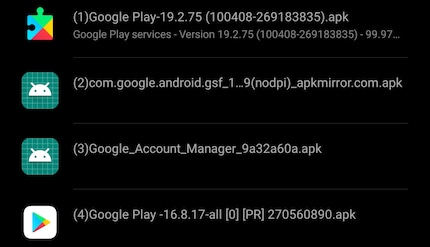
From now on, a warning will appear. It says that your device is not «Play Protect Certified» and that this should be fixed. Yes, that’s true, but if you choose to perform this hack, you take the conscious decision to live with this. You’ll have to swipe away the warning for the rest of the tutorial. We’ll fix it at the very end. Until then, I'm afraid you're going to have to bear it.
You don't need the USB stick anymore. Open the App Icebox on the phone. There's a tutorial that you can skip with «Cancel» – unless you’re actually interested in them.
We’re now putting the Google services into a so-called pseudo-stable state for a moment. This means we’re freezing the app so that it remains in a certain state while we work around it. Meanwhile, this relies on the system and the app saying «Sure, sure, that’s normal» for a moment, although everything isn’t okay quite yet.
On the PC, do the following:
A black console window opens.
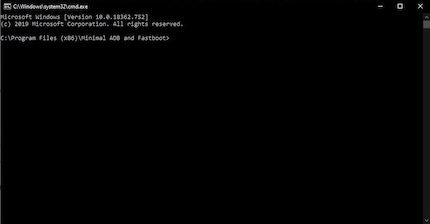
Let's quickly check if the device is recognised correctly. Enter the following command line.:
adb devicesIf that worked, the window will show something like this:
C:\Program Files (x86)\Minimal ADB and Fastboot>adb devices
List of devices attached
K5J0225308800836 device
We can work with that. Enter the following:
adb shell sh /sdcard/Android/data/com.catchingnow.icebox/files/start.shWe’ll start the Icebox as a developer. This becomes relevant in a second, as we cannot simply force the pseudo-stable state on the app level. The script start.sh has to run on another level.
If it worked, then the terminal says «success».
Without unplugging the phone, go to the Icebox app on the P40 Pro.
The app is now frozen.
Now we’re letting the P40 Pro forget that it ever had anything to do with Google. For a while. One of the four installed apps looks quite basic and is called «Google Account Manager». That’s the one we need right now.
We’re slowly coming to the end.
We’re now ending this hacking operation in a neat and tidy way.
Finally, let’s get to the warning that’s surely been annoying you for a few minutes now. It's easy to rid of it, but it takes a while. Any app that works with Play Protect Certification, i.e. all Google Apps, will work fine, but the certification will fail. Of course, your phone doesn’t fail to tell you this at every opportunity. On every app. That's why we have to disable it for each and every app.
When this warning appears:

In the hope that Google will show some mercy and turn off the play protect warnings, we can register our device as an exception. This doesn't work as well for every model, but it’s definitely no bad idea.
The work is now complete. Do all apps work? Yes, no, maybe. Remember, Google Services are still not supposed to be on a Huawei phone.
And that’s it for today. You can switch your phone back to German, French, Italian or Bahasa and use it the way you want. Enjoy!
Journalist. Author. Hacker. A storyteller searching for boundaries, secrets and taboos – putting the world to paper. Not because I can but because I can’t not.
Practical solutions for everyday problems with technology, household hacks and much more.
Show all