Fighting the notch: How to see what's important at the top of the screen and not the rubbish
Notches are getting bigger and the space for the status bar smaller. A lot can get lost. It is becoming increasingly difficult to maintain control over your own status bar. That's why I looked deep into Android's settings and found two solutions.
The world agrees: notches are annoying. And so does the industry: "Everyone wants notches. The bigger the better."
Okay. Then we'll just have to do it ourselves and get to grips with the notches - the indentations at the top front of the screen where the camera and speaker are housed - as long as the industry keeps fiddling with notches.

No matter how well the software handles the notch, you lose valuable space. This is because the status bar, the bar that is interrupted by the notch, provides you with important information:
- Status messages: Reception strength, mobile phone provider, battery, ringing volume
- Updates: New mails, new messages, missed calls, Tinder matches, open Incognito tabs...
If the notch is too big, the phone gets into trouble and can no longer display everything. This is what happened with my pre-production model of the Huawei Mate 20 Pro. As Huawei has not only installed the camera and speaker in the notch, but also a 3D scanner, the notch is wide. The 68 millimetre screen width measured with the ruler in the office has a 35 millimetre notch.

Source: Dominik Bärlocher
The phone has to prioritise. What is really relevant? What is not? Since the Mate 20 Pro has no options for prioritising Status Bar updates, I have to do it myself. Here are a few important notes:
- It may well be that your production model of the Mate 20 Pro is equipped with Notch Management. The software on my device is not finalised.
- As far as I know, everything I show in this article works on every Android device that has a status bar.
- You can break very little
- You need a computer with admin rights.
The problem in detail
A status bar, like everything else on your phone, follows a certain logic. As far as I can understand it on the Mate 20 Pro, four icons are displayed to the left of the notch and four to the right. Some status updates - battery level, provider name and clock - are allowed to break with this. Apps are not. This results in the following grid:

Source: Dominik Bärlocher
The Mate 20 Pro makes the wrong decision. It prioritises status information about updates. This means that if I have my provider name, Wi-Fi information, an alarm clock and Spotify on the left, there is no more room for the WhatsApp icon when a new message arrives. This icon is then simply not displayed.
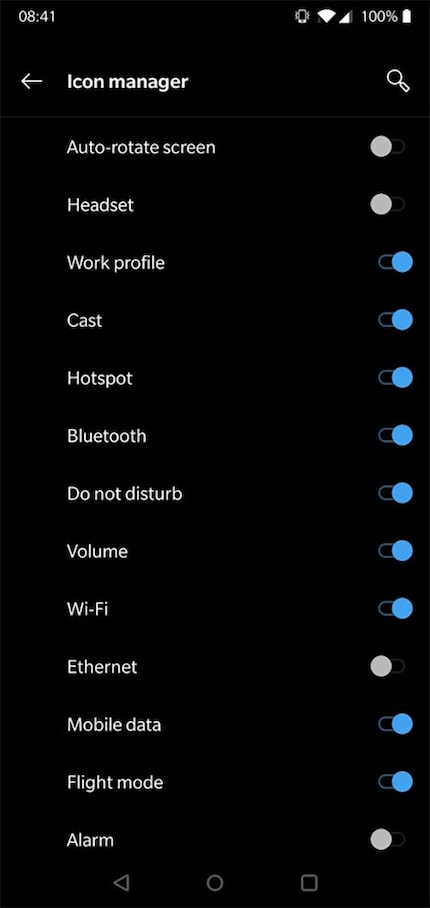
Some manufacturers have recognised this, especially OnePlus. In the OnePlus 6, you can specify in the settings which icons you want to see and which you don't.

This means one thing: it is possible to control the icons at the software level. There are two ways to do this. First, I'll show you the way that is for developers, but incomplete. You can help if you want. The second way is via app, but you need the Android Developer Bridge there too.
Get to work
Enable the Developer Options and USB Debugging
For both of the methods I'm showing here, you need the following:
- A PC with admin rights
- The drivers for your phone. Most manufacturers offer this in a package that you can usually download from their website if they are not already installed. Huawei does this, for example, with its HiSuite.
- Minimal ADB and Fastboot.
- A USB cable that connects your mobile to your PC
Install drivers and software. For all this to work, you must activate the Developer Options of your phone and allow access to your phone via USB. This is usually blocked for security reasons. Therefore: After you are finished, be sure to deactivate the USB debugging mode again.
- Go to the settings of the phone
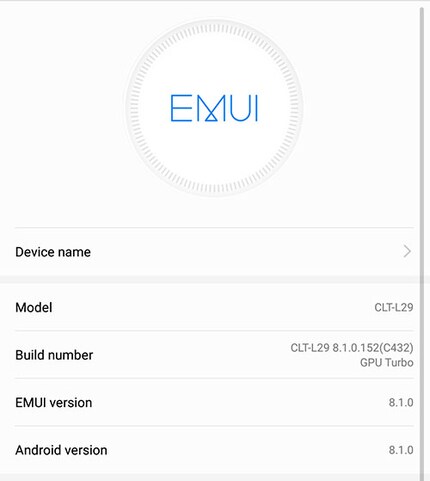
- Look for the menu item About Phone.
- Tap Build Number there five times quickly.
- A message will appear at the bottom of the screen saying "You are now a developer".

If you have done everything correctly, you can activate USB debugging. This is the option you need so that you can talk to your phone from your PC.
- Go to Settings
- System
- Developer Options
- Activate USB debugging
Now all that remains is to quickly check whether your PC is allowed to communicate with the phone. Open a console window and enter the following line:
adb devicesIf you have done everything correctly, an entry will appear. If not, check whether you have followed the guide exactly up to this point and have granted all authorisations on both the phone and the PC.
The manual way via adb only
This is where things get simple, because you can hide icons with a command line. But that's the crux of the matter. You only have one line, because you are passing an array to the Android system. Let's take a quick look at this in detail. The command is as follows:
adb shell settings put secure icon_blacklist [icons separated by a comma here] && adb rebootThese are actually two commands, because we are connecting two lines here. The part "&& adb reboot" essentially says "First do what it says up front, and then reboot the phone".
adb shell settings put secure icon_blacklist [icons separated by comma here]With this command you interact with the icon blacklist. If you want to view the entire blacklist, you can do so as follows:
adb shell settings get secure icon_blacklistOnce you fill it with apps and services that you never want to see again, it looks like this:

You will see the following line if you have already passed something to the system
airplane,alarm_clock,clock,data_saver,dmb,do_not_disturb,ethernet,eyes_protect,headset,hires,hotspot,ims_indicator,location,managed_profile,nfc,oth_mouse,rotate,tty,unicom_call,volte,volume,vowifi,vpn,wifi_calling,zenThis is a so-called array with a comma as delimiter.
- Array: A series of values or variables that are read and interpreted by the system
- Delimiter: A character that divides individual values or variables. The system sees "an array entry ends there and another one begins there"
In order to start with Notch Management, we need to pass an array to the icon_blacklist that can be read by the system. The problem: I don't know of any resource where I can find all valid array arguments. There is no whitelist in the secure settings and there is nothing online either.
Therefore a call: If you find any documentation on this, drop me a comment. Then I'll make an update here.
As things currently stand, I can identify the following arguments:
- hotspot: wireless hotspot
- bluetooth: The B at the top
- zen: Sleep mode
- alarm_clock: Alarm clock
- managed_profile: If supported by the device, the space that uses your work profile
- wifi: WLAN
- ethernet: Ethernet
- mobile: Mobile data
- airplane: Flight mode
- clock: Clock
- data_saver: Data saver mode
- dmb: DMB, television tuner
- do_not_disturb: Also sleep mode
- eyes_protect: Blue light filter
- headset: Headphones or headset connected
- hires: High-resolution display active
- ims_indicator: IP multimedia subsystem
- location: GPS data
- nfc: NFC
- oth_mouse: External mouse connected
- rotate: Rotation of the screen on/off
- tty: TTY access
- unicom_call: Setting of a Chinese mobile phone provider with special functions
- volte: Voice over LTE, but does not seem to work
- volume: volume
- vowifi: Voice over WiFi
- vpn: VPN
- wifi_calling: Calls via wifi
Important: If you deactivate these icons, you only deactivate the visual indicator that the function is currently running, but not the service. So if you add alarm_clock to the array, your alarm clock will still ring. You just hide the icon at the top of the status bar.
If you want to define the blacklist via the command line, you must pass a complete array to the system. Every time you want to add something, you have to overwrite the entire array.
An array in the example
Suppose you want to deactivate the icon for VPN and Bluetooth. You must transmit the following line via adb:
adb shell settings put secure icon_blacklist vpn,bluetoothThis replaces the current array, even if it is empty, with "vpn,bluetooth". As the array is overwritten each time, you must pass all arguments each time. So, if you want to add Wifi here, you can't just throw in the following line:
adb shell settings put secure icon_blacklist wifiThis line overwrites the entire blacklist and so you only hide Wifi. If you want to add a third icon, the command line is:
adb shell settings put secure icon_blacklist vpn,bluetooth,wifiThe method via app
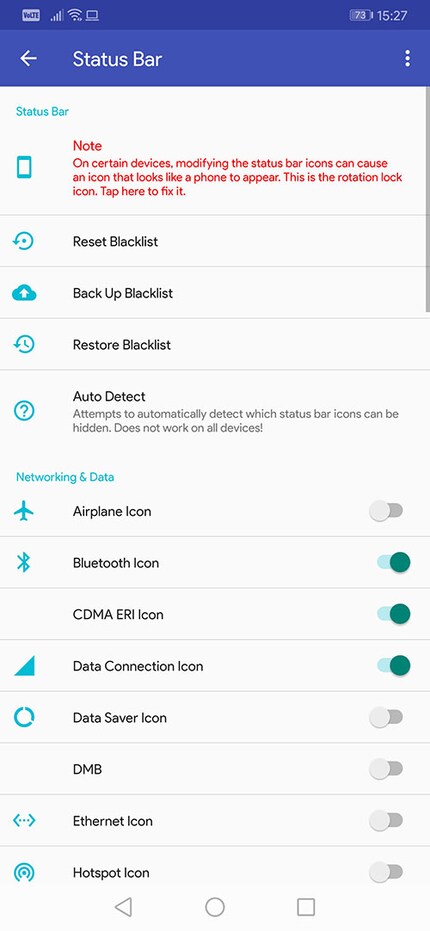
Of course, there is an easier and more elegant way to solve the problem with the notch. With the app SystemUI Tuner from developer Zachary Wander. However, as the app intervenes deeply in the system, it requires authorisations that you cannot grant in the normal way. But you can with adb. So install the app, read the instructions on the screen carefully and transfer the following lines to your device via adb.
adb shell pm grant com.zacharee1.systemuituner android.permission.WRITE_SECURE_SETTINGS
adb shell pm grant com.zacharee1.systemuituner android.permission.PACKAGE_USAGE_STATS
adb shell pm grant com.zacharee1.systemuituner android.permission.DUMP
You can combine this, as above, into one mammoth line:
adb shell pm grant com.zacharee1.systemuituner android.permission.WRITE_SECURE_SETTINGS && adb shell pm grant com.zacharee1.systemuituner android.permission.PACKAGE_USAGE_STATS && adb shell pm grant com.zacharee1.systemuituner android.permission.DUMPVoilà! The app works. Unless you are employed with a Samsung phone. Some special rules apply there, which Zachary lists.

The problem here is that Zachary's app does not list all apps that want to display something in the status bar. You can run a scan through your system under Status Bar → Auto Detect, which will find many apps, but this is not complete.
The future
If there's one thing this article should tell you, it's that Android must have Status Bar Management in the kernel. It cannot be that you have to rely on the goodwill of a manufacturer who means well for you. If Samsung introduces special rules or Huawei doesn't provide an appropriate setting, then it's not you who should lose out. No, this responsibility lies with Google. Because the Status Bar Management, which icons you want to see there, these settings should or even must be up to you.
Of course, you can achieve a lot with adb and apps like Zachary's and make many things better, but we are still a long way from "good".
So, that's it. You now know what an array is, how to use it and how to make your life a little more pleasant with a notch. Have fun.
Journalist. Author. Hacker. A storyteller searching for boundaries, secrets and taboos – putting the world to paper. Not because I can but because I can’t not.
Practical solutions for everyday problems with technology, household hacks and much more.
Show all