
Product test
HU85LS: hands-on experience with LG’s perfect projector
by Luca Fontana

RGB laser projectors are the future. To find out why and how the devices work, we sacrificed a 6000-franc projector so you don't have to. Because taking something apart is one thing, but putting it back together is something else altogether.
Projectors are fascinating pieces of technology. There's a box. Inside is a lamp. It uses either a chip or an LCD. That's where the beam of light comes from, through a lens and then onto the screen. The cinema magic is complete.
But it's not that easy.
In the article above, I mainly examined how the image is created in a projector, but I wanted to take a closer look at the lighting technology. In laser projectors, to be precise. LG's new ultra short throw projector gave me the perfect opportunity.
I took the projector apart and thoroughly examined it for LG company secrets. I took the task pretty literally: I couldn't put the wretched thing back together afterwards. So there won't be an extensive projector test, sorry. But there will be really great and rare photos of the inner workings of a laser projector.

Right, let's get started.
Laser projectors are special because they use lasers instead of a conventional lamp as a light source. Not lasers as in «James Bond in pursuit of Dr. No», but dozens of small laser diodes which are combined to form one large beam of light. A single strong laser can be misused or result in burns and glare in the event of an accident.
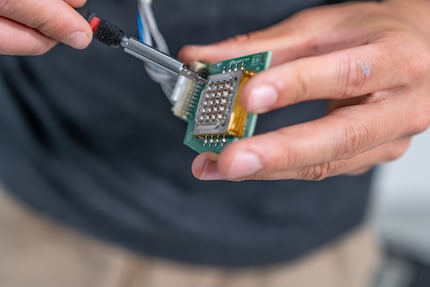
Generally speaking, the more diodes there are, the stronger the light. This boosts the image quality in light living rooms. The diodes last longer too: a UHP projector lamp has an average lifespan of around 4,000 hours. Laser diodes, however, last around 20,000 hours.
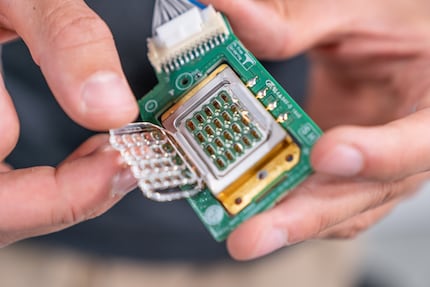
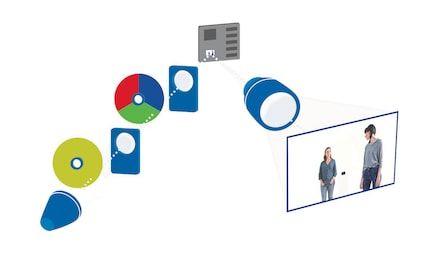
The image in DLP projectors is created by the 1x1.5 cm DMD chip. Its surface is made up of millions of microscopic mirrors, which are arranged in a grid, controlled individually and represent one pixel each. When the pixel needs to light up, its mirror is moved into the path of the light beam so that the light is reflected towards the lens.
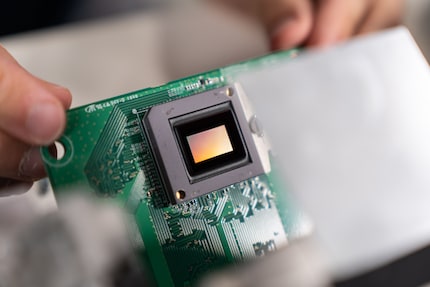
The colour of the pixel comes from the colour wheel. Because the initially white light has to be «coloured in».
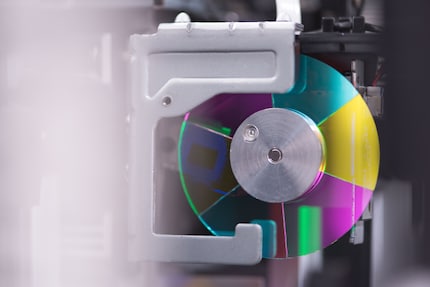
The problem with laser projectors is that laser light is bluish. Not because diodes with white light are impossible to create. But they're expensive to make and don't last as long as bluish laser diodes.
This is why a phosphor wheel is added to the colour wheel: the energy-rich blue laser light stimulates the phosphorous layer into glowing yellow. Finally, the yellow phosphorous light is directed through the colour wheel and «coloured in» with red and green. The spectral components of the blue laser light are retained: red, green and blue light meets on the DMD chip and is beamed onto the screen.
In principle, LCD projectors work in exactly the same way as LCD TVs: rear light meets on LCD panels made from a million pixels to create the image. Except that the projector doesn't have one LCD panel; it has three.

Each of the three LCD panels represents a base colour: red, green or blue. The light, which merges on the LCD from behind, is the same colour as the panel itself. But the light in LCD projectors isn't coloured in; it's split into its spectral components beforehand: white light is actually made up of red, green and blue. The light is divided by dichroic mirrors, which can reflect selected spectral components – such as only red or only green – or let them through.
But, the only problem with laser light in LCD projects is the same as DLP projectors – it's initially blue. So a phosphor wheel is also used here to make it not quite such a pure white.
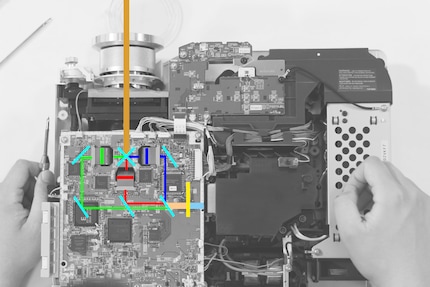
Above: the phosphor wheel in front of the laser module is lit by the blue laser, the phosphorous is illuminated and turns the blue light into yellow light. Then dichroic mirrors – the turquoise bars in the graphic – «split» red and green from the yellowish light, while the laser blue is reflected right onto the LCD panel.
Below: a look at the laser module, which is designed to beam directly onto the dichroic mirrors when it's switched on. What's missing here is the phosphor wheel. This is because the photo comes from the RGB laser projector, which doesn't require one. More on that later.
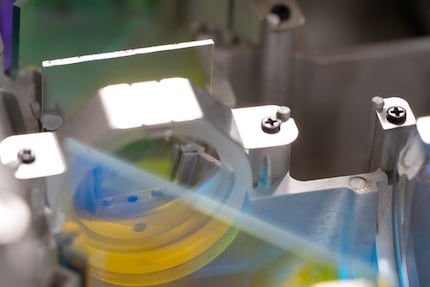
Finally, all of the beams of light pass through a prism – the turquoise «X» on the graphic above. In the prism, the red, green and blue images are compiled to form a single multicoloured image. Then it's onto the screen via the lens.
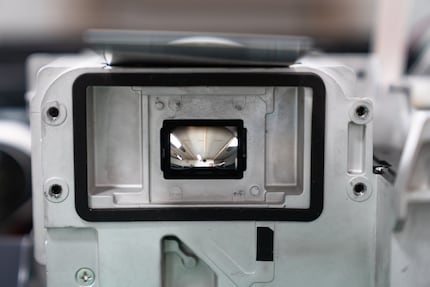
A drawback of laser DLP and LCD projectors is that only the colour blue comes directly from the laser. Red and green only come into play when the phosphorous is introduced. If you made a diagram of the image created by the projector with all of its different spectral components, it would look something like this:
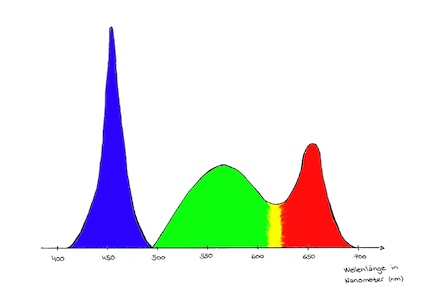
Above: the blue parts are numerous and narrow. Visually, this creates a very pure, intense blue. On contrast, green and red are wide, making them much paler.
It's easy to create an SDR image. Most laser projectors correct the red-green deficit with powerful colour management software. HDR images – with increased colour spectrums which result in a contrast-rich image with natural colours – are more tricky. This is why HDR-ready laser projectors are rare.
RGB laser projectors don't use a laser module with bluish laser light; they use three: two blue modules and a red one. A «G refiner» lens in front of one of the two blue modules changes blue light into green light.
In theory, the LG RGB laser projector with its DMD chip works like this:
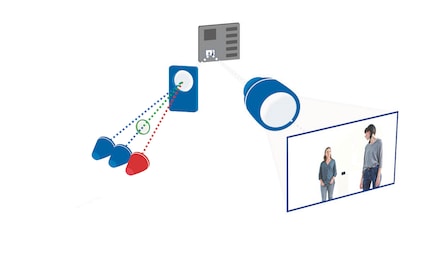
In practice? I'm not 100% sure exactly where the laser diodes are. The engineers that would know are sitting in South Korea, where the projectors are made or at least designed.
I'll give you my theory. But first, the view that I had on unscrewing it:
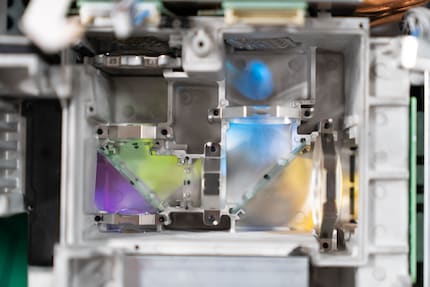
My assumption is that the two blue laser modules are on the top right and right. So where the light is bluish and orange. The lens in front of the diode on the right-hand side is bigger than the other lenses. This is why I suspect that the G refiner lens is what changes the blue laser light to green. The orange in the image is probably the result of me removing the lid: the lens creates ambient light which doesn't normally exist.
That means that the red laser diodes are on the top left. All three beams of light meet at the green dichroic mirror and are reflected towards the DMD chip – that's my theory.
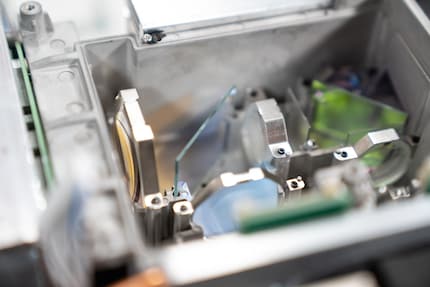
I can't verify whether I'm right or not. For that, I have to supply the projector with power and switch it on. I have no idea whether this is a good idea with exposed lasers.
The projector would no longer work for long anyway: to get to the inner light path architecture, I had to use force in areas of a projector where you definitely shouldn't use force. The heat sink, for example. You can see it on the top right of the image below – a grooved box with copper joints.
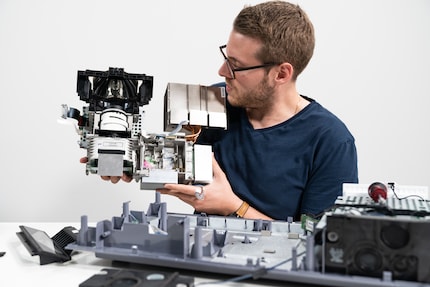
By now, the heat sink is in heat sink heaven. Video producer Manu was in the way when we took the next photo – along with both laser modules, which were set to shine through the lenses.
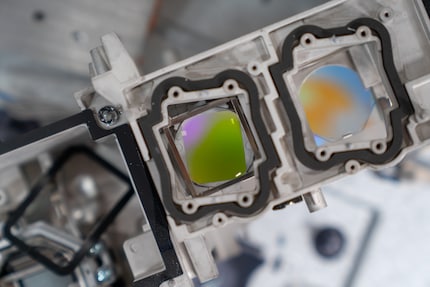
We had to unscrew the latter anyway so that we could photograph the diodes separately. The heat sink was obstructing the screws. So it had to go. You see, what we do, we do in the name of science. Not out of a love of destruction.
But, if you have a different hunch to me about the images above, let me know in the comments. If you even know for sure, we can write a follow-up article together.
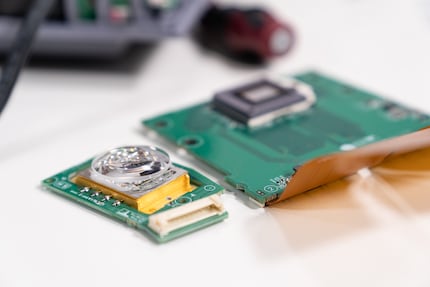
What I can say with certainty, however, is that the two extra modules eradicate the need for a phosphorous later or colour wheel, which is common on DLP projectors. So red and green are as pure as blue in the RGB projector image. This enables much larger colour spectrums than on other projectors. There's no rainbow effect in fast action scenes, which is common to DLP projectors.
What you've seen in this article are extremely rare images of the inner workings of a projector. They might even be unique. I would have been better off carrying out an extensive text beforehand, idiot that I am, because putting the thing back together is...simply impossible.
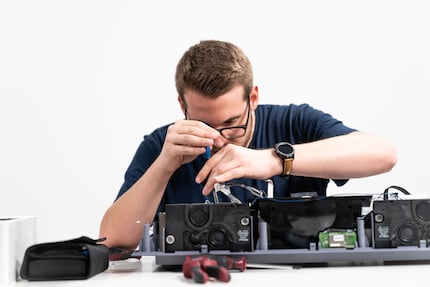
Nevertheless, I'd say that the exercise was worth it. My question for you is: what should I take apart next once I've tested it? Keen on more articles like this? If so, I'll see what I can do. Not all manufacturers will be happy for me to dismantle one of their premium products.
But asking wouldn't hurt.
I write about technology as if it were cinema, and about films as if they were real life. Between bits and blockbusters, I’m after stories that move people, not just generate clicks. And yes – sometimes I listen to film scores louder than I probably should.
Interesting facts about products, behind-the-scenes looks at manufacturers and deep-dives on interesting people.
Show all