
Polaroid PlaySmart: The 3D printer for the classroom
Polaroid wants to make 3D printing more accessible with the PlaySmart. The manufacturer is doing a great job, and the device also impresses with good printing out of the box.
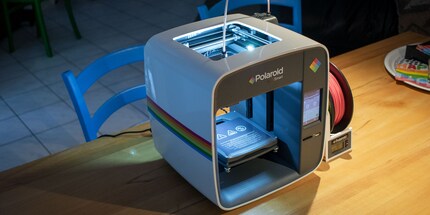
The PlaySmart looks stylish. It reminds me of a square Easter egg with a hole in the centre. A 3D printer should only look good in the third instance. User-friendliness and the quality of the prints are much more important.

Here is an overview of the most important data:
- Size: 290×330×270 millimetres
- Weight: 5 kilogrammes
- Printing area: 120×120×120 millimetres
- Printing material: PLA, PETG, P-wood
- Layer height: 0.05 to 0.3 millimetres
- Touch screen: 3.5 inches
- Wifi camera for monitoring and creating timelapses
- Filament holder with scale
- Heated print bed made from magnesium-aluminium alloy
Commissioning
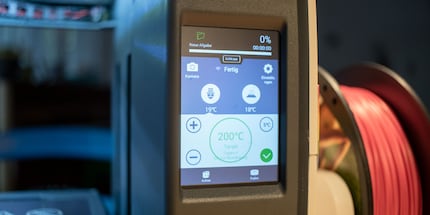
The PlaySmart is compact at 290×330×270 millimetres. The device is mainly made of plastic, which is why it weighs around five kilos. The belly area measures 120×120×120 millimetres. There is a 3.5-inch touchscreen for operation on the right-hand side.
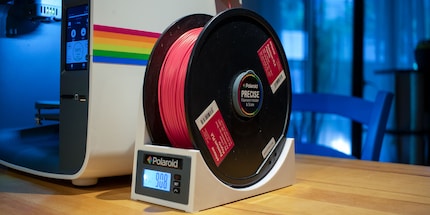
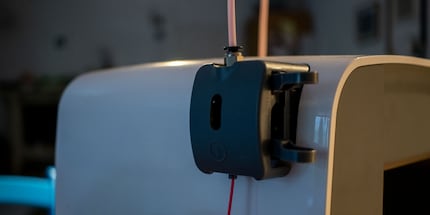
The printer comes with three 0.4 millimetre replacement nozzles. Unlike most other printers, the filament holder, which Polaroid calls the "Precise Filament Holder and Scale", is not attached directly to the device. You place it next to the extruder, which pushes the filament into the nozzle. The practical thing about the holder is that it has a built-in scale. 3D printing material is measured in weight. Thanks to the scale, you always know how much material you have left.
Thanks to the quick-start guide supplied, the printer is up and running within ten minutes - I've rarely had a 3D printer ready to print so quickly before. First, the Teflon tube has to be fitted. The filament - the printing material - will pass through this later. I then have to switch on the printer and am guided through the rest of the setup process via the touchscreen. Loading the filament is easy and doesn't involve any fiddling. To do this, I feed the material a few centimetres through the filament sensor and the extruder - which later pushes the filament forward. With a click on the touchscreen, the extruder does the rest for me.
Optionally, I can connect the printer to the smartphone at this point. This allows me to monitor the printer or send print jobs. However, I can only use models from the Polaroid database or those that are already on the SD card.
Last but not least is the bed levelling. This involves aligning the build plate so that the prints adhere to it. The touchscreen guides you through this process without any problems. The PlaySmart is now ready for the first print.
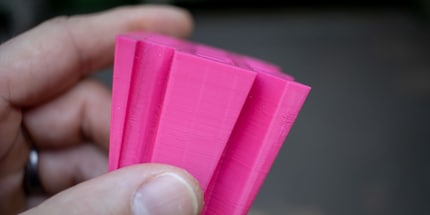
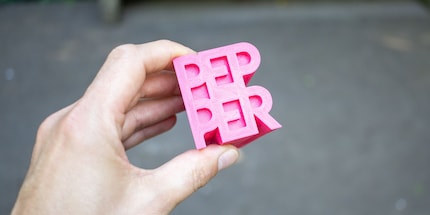
I give the PlaySmart print commands in the classic way using an SD card, which I insert into the built-in card reader, or via USB cable directly on the PC. The third option is the smartphone app, which communicates with the printer via Wi-Fi. It's available for Android and iOS. I start by using the classic method with an SD card and print a pepper shaker for my colleague Livia Gamper. She likes pink and that's exactly the colour Polaroid supplied with the printer. The shaker looks pretty good for a first attempt. What I notice during printing: The printer is quite loud. With my dB meter, I measured 52 dB from two metres away.
The software
Since the PlaySmart is aimed at beginners, Polaroid provides its own slicer - the software called "Polaroid SmartPrep", which prepares 3D files for the printer. The programme does not offer many setting options.
Position, rotation and size can be adjusted on the X, Y and Z axes. I have a choice of eleven print settings. This is no comparison to the open source slicer Cura, which offers well over 100 setting options. However, the options are sufficient for beginners. The limited options are even an advantage when starting out, as beginners feel less overwhelmed by the possibilities.
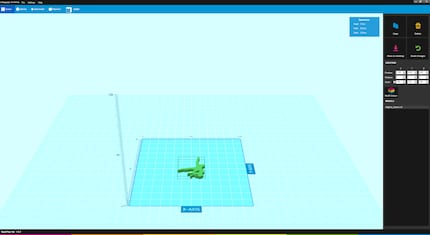
The slicer gives me the option of multicolour printing. I select the height at which I want to change the filament and therefore the colour. The printer then interrupts the printing process and I can load new filament.
As I now have some experience with 3D printers, I want to know whether the PlaySmart is also easy to use for beginners. It seems ideal for schools that want to give an introduction to 3D printing. That's why I let eighth-grader Maya use the device for a week. I'll give her an introduction first and then let her print it herself.
A week with the PlaySmart 3D printer
Maya, whose real name is omitted for data protection reasons, literally soaks up my information. Interested, she keeps asking what is called what and wants to know the individual functions of the components. As her notebook is not the latest, SmartPrep only runs on it to a limited extent. That's why she first gives the print commands via the smartphone app and only in a second step via Polaroid SmartPrep. Her conclusion after a few days:
The PlaySmart is very easy to use. I was able to print items efficiently and easily, especially via the mobile app. It's a bit more difficult via the computer, as I have to check and customise several functions there. But I quickly understood it after seeing and doing it a few times.
Maya has a little more trouble during testing with bed levelling. Although the prints are initially flawless, she later has problems with print adhesion. As it turns out, one of the nuts for fixing the print bed had come loose and the print bed was therefore no longer perfectly adjusted.
After that, the printer worked great again. I find it very interesting to work with the PlaySmart and I can't get enough of watching the printer at work.
Print quality: from okay to excellent
So is the PlaySmart the perfect 3D printer for the classroom? Not quite. It's simply too loud for that. As a pupil, I wouldn't want to sit in the same room. But the printer is definitely ideal for handicraft lessons. It gives students a first insight into 3D printing and allows them to experiment for themselves.
My first test print with the PlaySmart went off without a hitch. My colleague Manuel Wenk is currently building a racing drone. He needs brackets from the 3D printer for this. I'm printing these for him with the PlaySmart. These parts also look pretty good.
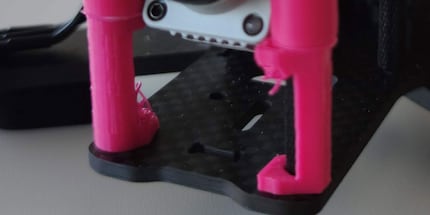
With bridges - places where the printer has to fill gaps in the air - the printer sometimes has problems and some extruded filament hangs down. This could be counteracted with a little more fine-tuning in the slicer. However, the setting options in SmartPrep are missing and I would have to switch to Cura or another slicer.
Conclusion: Perfect for beginners
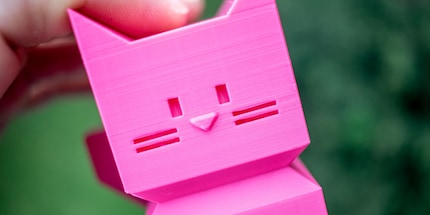
The PlaySmart impresses with its user-friendliness, print quality and cheeky appearance. However, the print area and setting options are limited. The price of just under 450 francs / 400 euros is relatively high. The printer is suitable for beginners and schools, as it works without prior knowledge and delivers good prints.
From big data to big brother, Cyborgs to Sci-Fi. All aspects of technology and society fascinate me.
